


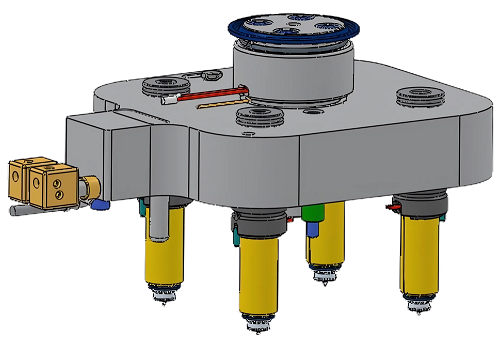
*Hot Runner System
You can watch a detailed video tutorial of the entire process HERE.
To configure a 2D/3D drawing of a Thermoplay® Hot Runner System, you need to visit the website: https://www.thermoplay.it/en/.

Once inside the configurator, you need to select the option for configuring a Hot Runner System (HRS).

THE FIVE CONFIGURATION STEPS ARE:
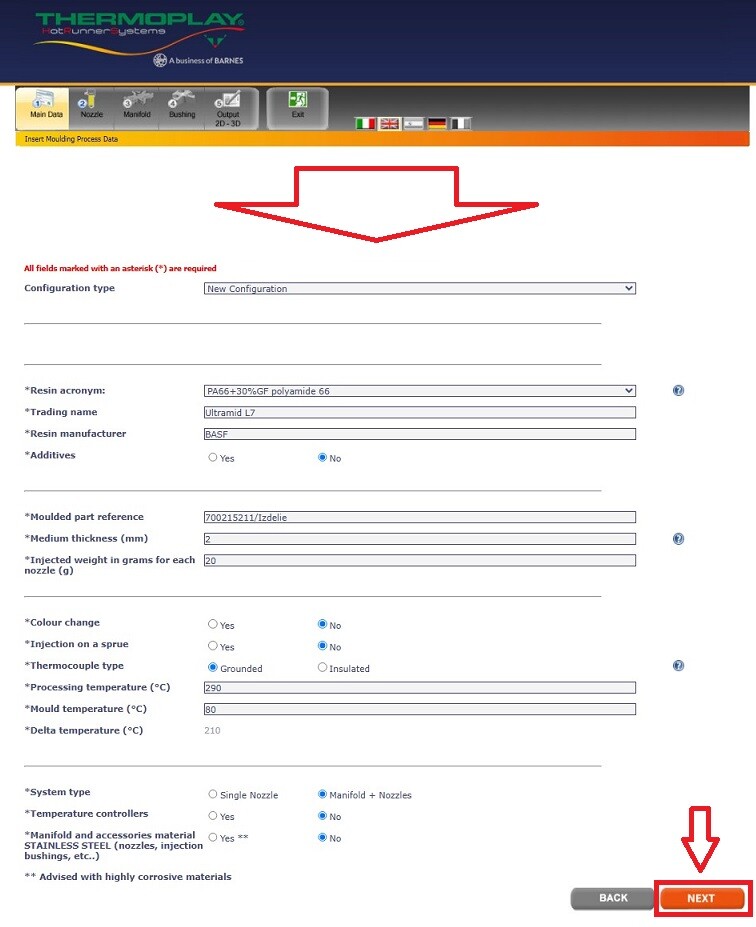
Step 1 – GENERAL INFORMATION
In the first step, you define the process parameters for:
• Material – type, trade name, manufacturer, presence of additives;
• Part – name, average wall thickness, weight of the injected material;
• Process information – color change, direct combined molding with cold runner, type of thermocouple, processing temperature of the material and the mold;
• System – central nozzle or hot runner system, need for a temperature controller, stainless steel option.
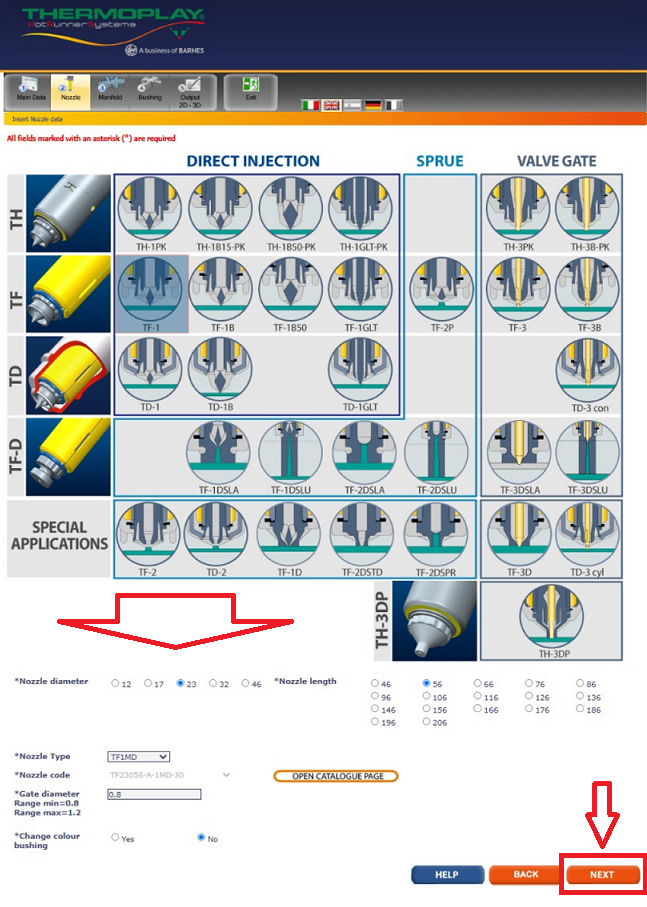
Step 2 – NOZZLE SELECTION
In the second step, you select the type of gate, the nozzle diameter and length, and the gate (injection point) diameter.
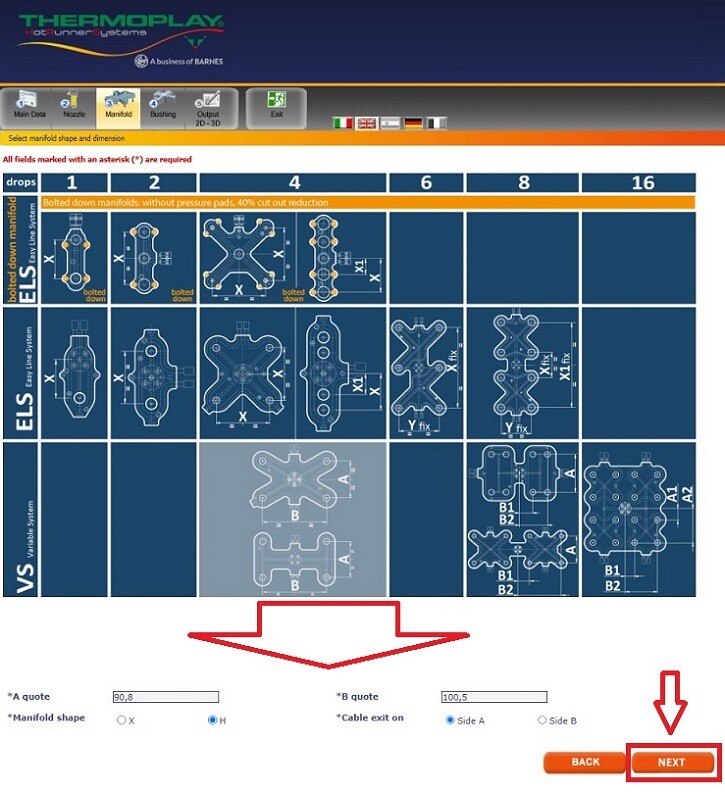
Step 3 – MANIFOLD SELECTION
In step three, you choose the type of manifold – number of drops, layout, and coordinates.
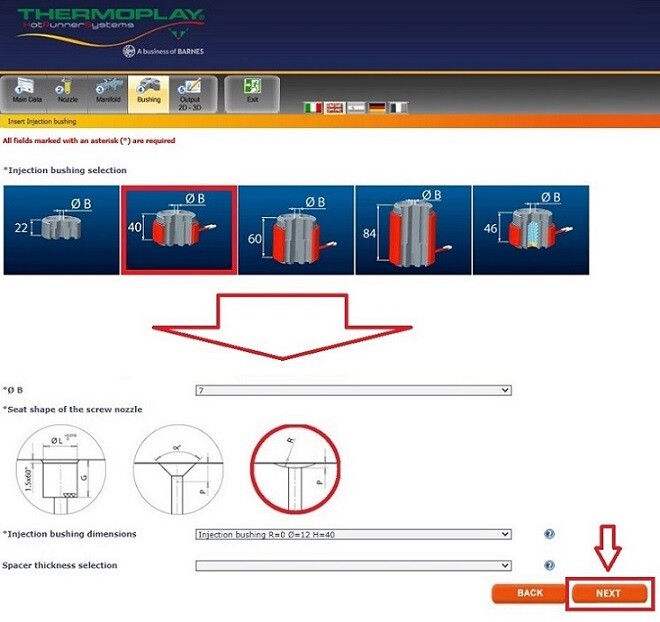
Step 4 – INJECTION BUSHING SELECTION
In step four, you select the type of injection bushing, the inlet diameter, and the front radius.
Step 5 – DRAWING FORMAT SELECTION
In the final step, you choose the format for the drawings:
• 2D – DXF or DWG
• 3D – STEP or IGES
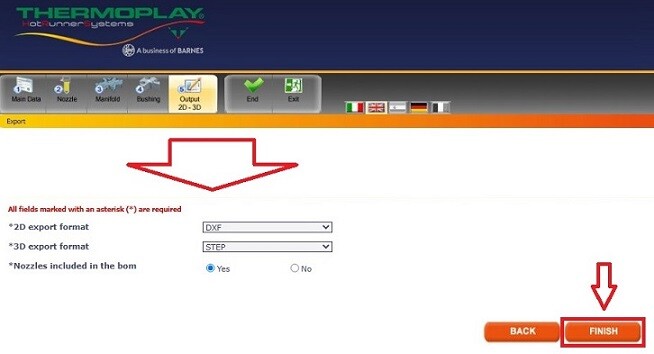
After completing the final step, you will receive an email with a ZIP file containing the necessary files:

If you need additional information, a 3D model, or a consultation, feel free to contact us.
KRASCO
Did you like the article?
Please rate it with the stars below.